- All-In-One Beekeeping for the Bees
- +1-608-728-8233
- info@beepods.com
Save the Comb!

By Laura Maigatter
Hello Everyone!
I hope you’ve had a lovely winter so far. Winter means different things to different people, but to me it means it’s time for Winter Projects. All those things you’ve been putting off all year- like what to do with all that comb?!? So much comb…
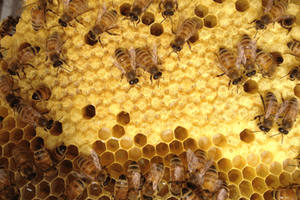
If you’ve been beekeeping for any amount of time, you have likely noticed little bits of comb scraps piling up around you. If it’s from removing the wonky comb your ladies decided to build, or comb that wax moths got to, it just seems wrong to throw it away. Go with that instinct.
Keep the comb! Beeswax is a highly versatile, all-natural alternative to many of the petroleum-based products that permeate our lives.
Need to protect some cutting boards? Beeswax.
Need to waterproof boots? Beeswax.
Need light? Beeswax.
Wanna paint? Beeswax.
Want soft, protected skin all winter long? Beeswax.

Specifically, our Bee Better Butter. Formulated with beeswax, honey, and propolis to offer your skin the strongest protection we could imagine.
You get the picture. Beeswax can be used in a myriad of ways with little alteration. The trick is getting the raw comb from your hive into usable rendered beeswax. Disclaimer: I mean trick, the process is a bit cumbersome and kinda dangerous. Beeswax is flammable. Really, really flammable. For real.
Here are a few tips to get the most out of this particular, delightful bee byproduct:
Step 1: Finding a home for it after collecting: we recommend a plastic container with a lid because it discourages unwelcome guests. Many animals find beeswax to be a tasty treat. You can also use a garbage bag, or really whatever is around. Just make sure you have a designated place for it.
Step 2: Feel free to crush it before putting it in it’s new home. It takes up WAY less space once you compress it, and compressing will not affect the quality of the wax once you render.
Step 3: Once you have a sizable pile, prepare to render the comb. I’m going to be completely honest with you here, it’s a bit of a process. Here at Beepods, we have designated equipment for wax rendering since the wax gets on everything. It is also a several day process from start to finish, that is best completed outside, in a garage, basement, etc.
Step 4: Read our Wax Rendering: Pros and Cons post, and decide if it’s right for you. We are currently working on a Very Exciting Trade-in Program for your wax and propolis!! (sneak peek: you’ll be able to send us your propolis and un-rendered wax, in exchange for credit to get either our rendered wax, Bee Better Butter, or anything else on our site! We wanna save you the time and trouble of rendering yourself, while still letting you enjoy the fruits of your bees’ labor.)
Step 5: Coming soon in our Lab, we’ll have complete instructions on how to go about rendering wax yourself. It is a comprehensive how-to that should get you safely from start to finish.
Step 6: Pick a project and get going! Here is our post containing easy and fun Beeswax Recipes!
BEE the Change
Laura Maigatter
Latest posts by Laura Maigatter (see all)
- Bees Pollinating Flowers & Gathering Last-minute Nectar in Fall - November 16, 2016
- Queen Spotting Tips for Newbee Beekeepers - July 26, 2016
- Beepods Guide to Defend your Bees from Pesticides - June 27, 2016


